Getting Started
How to Register and Add a Discord Account to UserAPI.ai
This guide explains the full onboarding flow from account registration to adding your Discord account and making your first API request to generate an AI image with Midjourney (please note: this is an unofficial integration).

Before You Start
- You need an active Discord account.
- Your Discord account must have an active Midjourney subscription via Midjourney Bot.
Like most people in the community, we do not recommend buying the Pro Plan and Mega Plan. It's better to create several Discord accounts and purchase either the Standard or Basic plan for each one.
Step 1. Register on UserAPI.ai
- Open the sign-up page.
- Create your account using your email.
- Open your inbox and confirm your registration via the email link.
Step 2. After Email Confirmation
Right after confirming your email, you will be redirected to the Discord accounts page in dashboard.
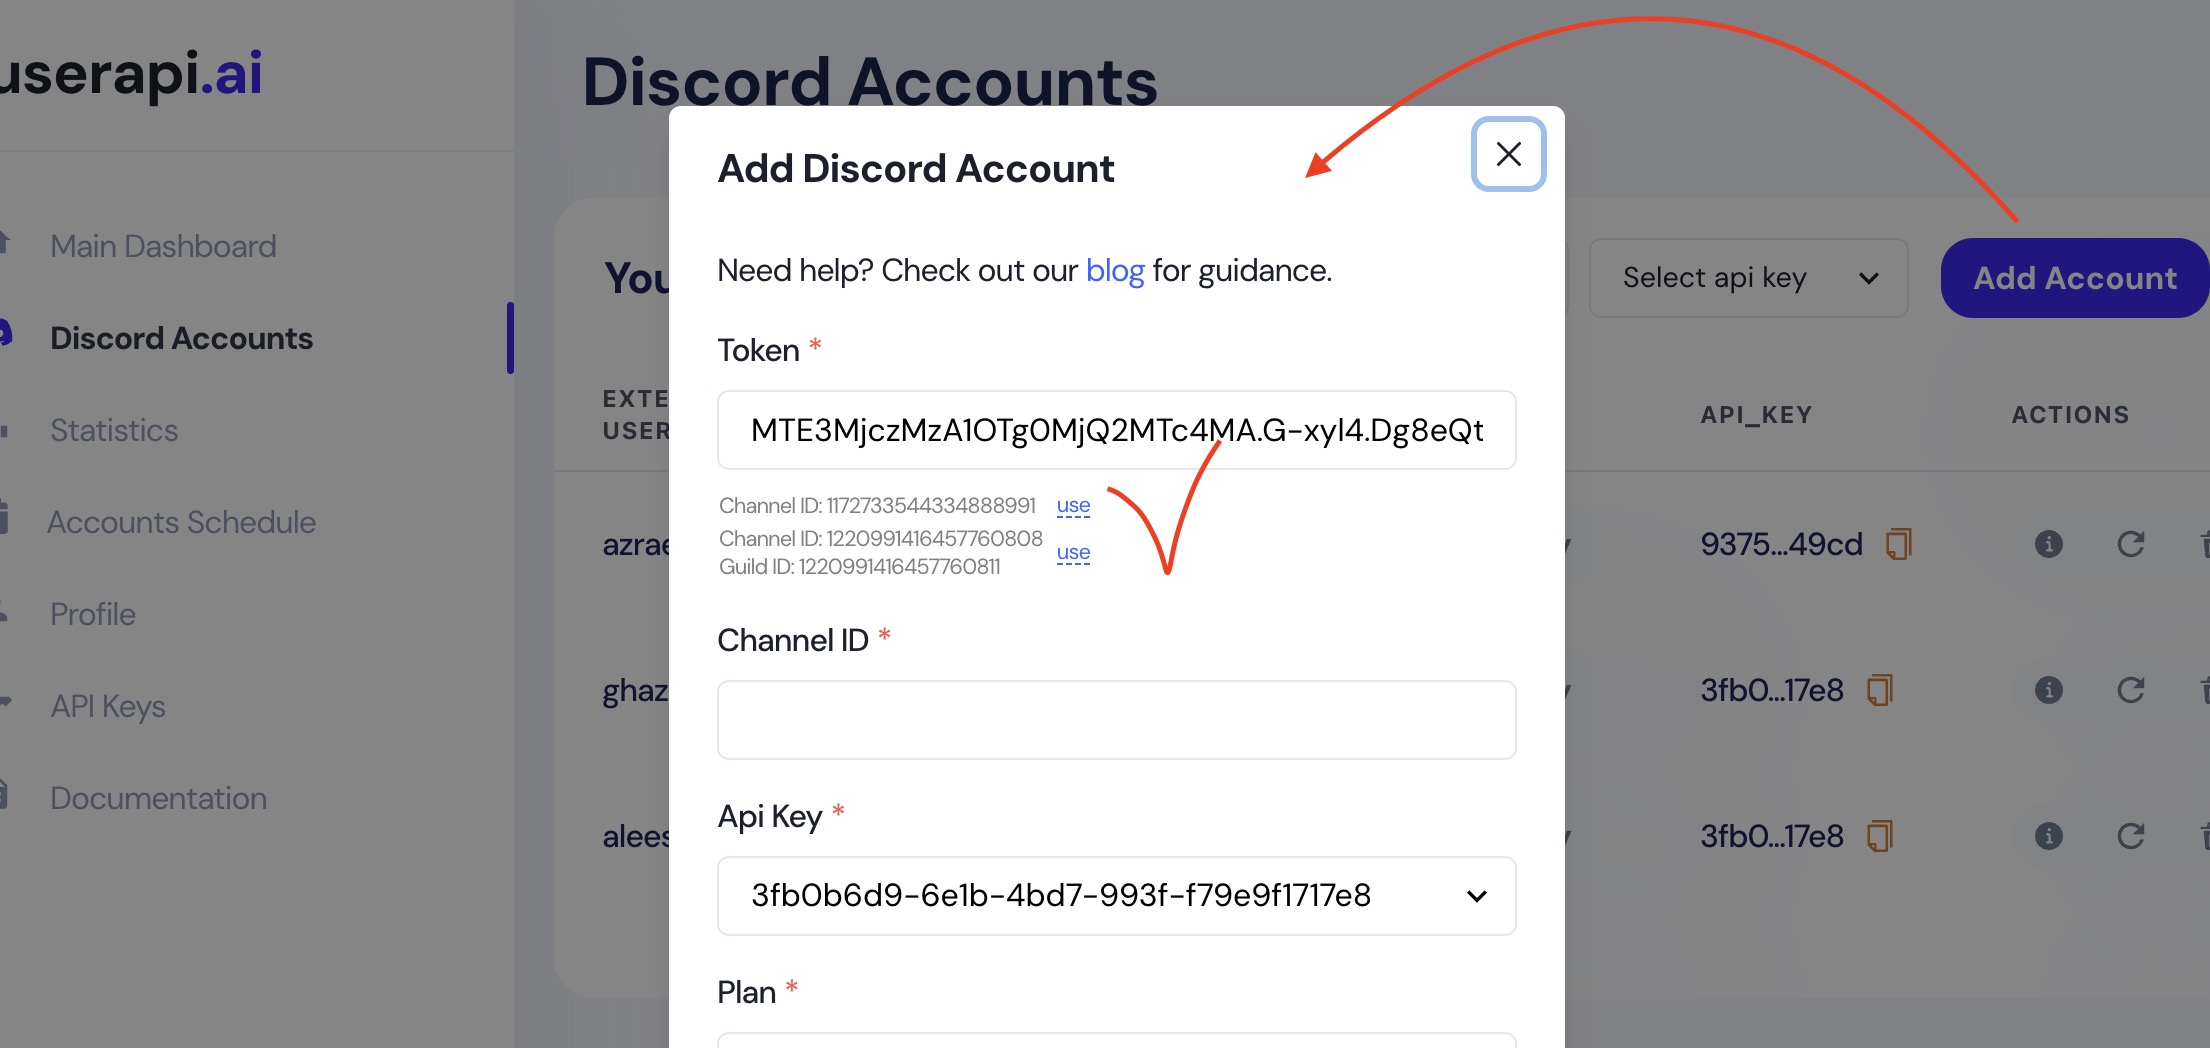
Step 3. Click Add Account
On the Discord accounts page, click Add Account and keep this form open. The next steps explain how to get the token and complete the fields correctly.
Step 4. Prepare Your Discord Session
Log in to your Discord account in a browser, preferably in incognito mode. Then open a direct message with Midjourney Bot and run a command, for example:
/imagine nice girl in the red hat
If Midjourney asks you to accept Terms of Service, accept them and generate your first image.
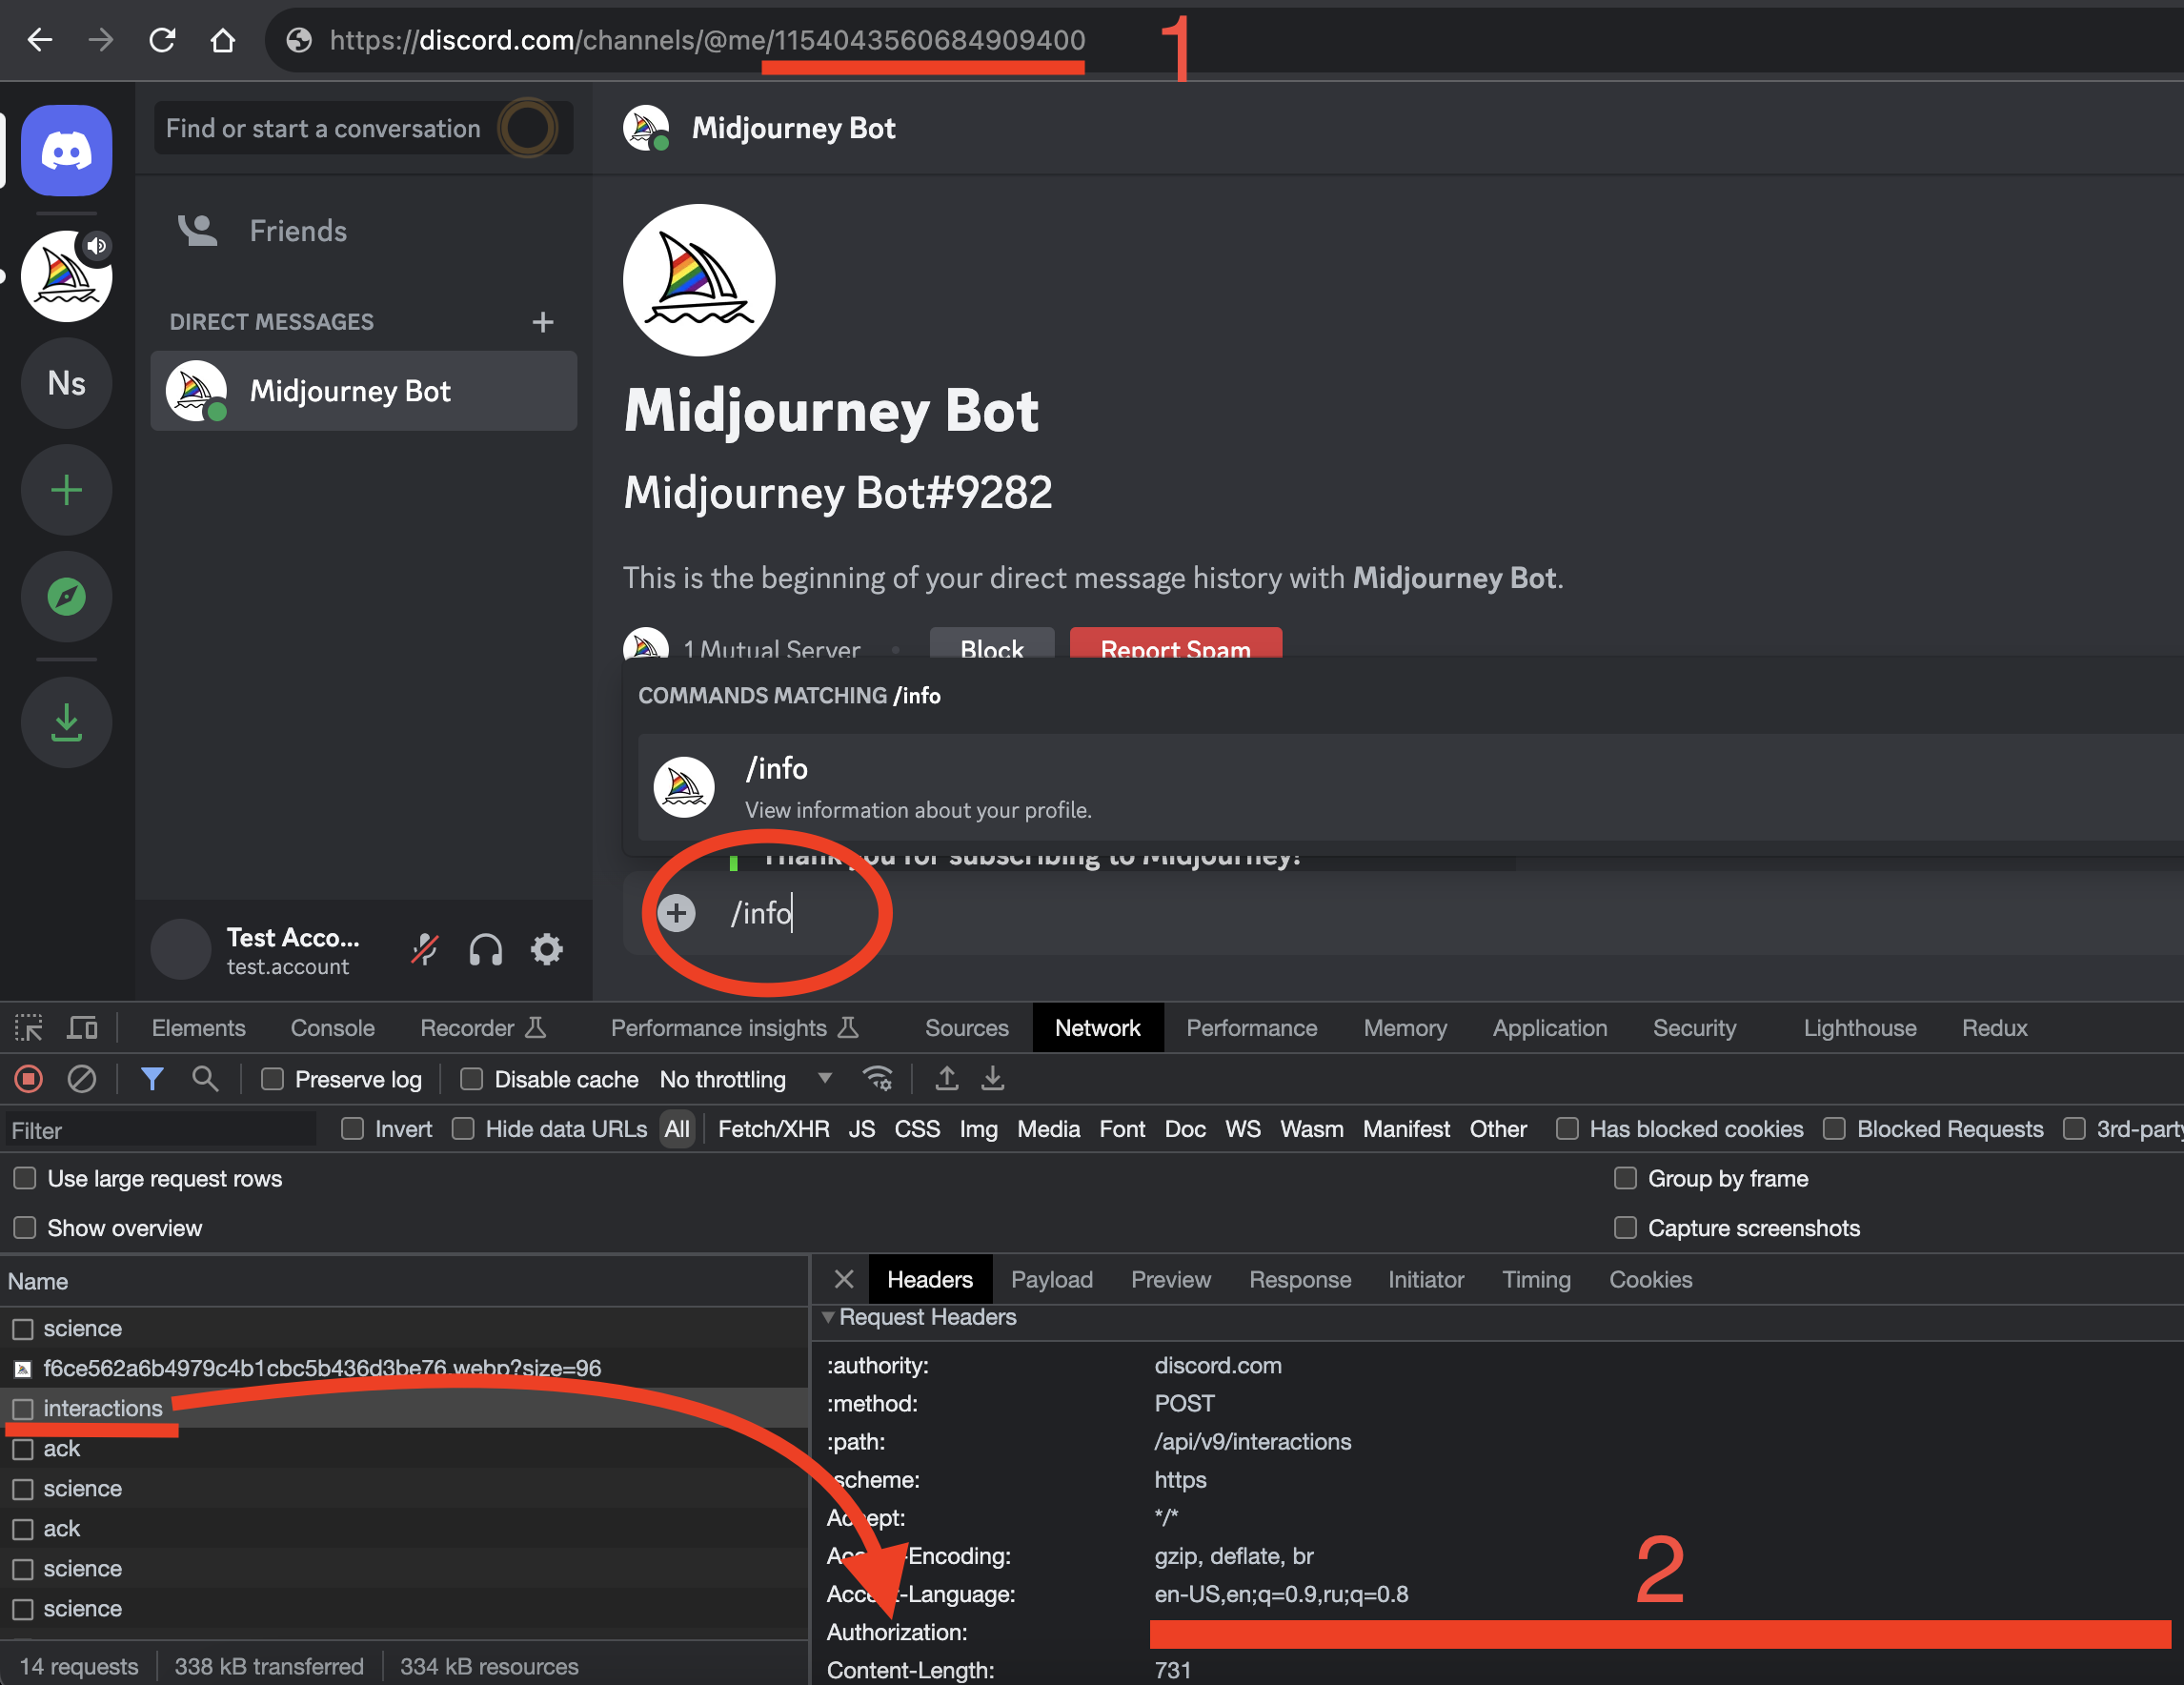
Step 5. Get Your Discord Token (Authorization)
- Open Developer Tools in your browser (see image below). Open Developer Tools with
F12,Ctrl + Shift + Ion Windows/Linux, orCmd + Option + Ion Mac. - Go to the Network tab.
- Send the
/infocommand to Midjourney Bot. - Find the request named
interactions. - Open the Headers tab and copy the Authorization value (in the image below, this is shown as marker
2).
Step 6. Paste Token in UserAPI and Confirm IDs
Paste the received token into the Token field, then wait until Channel ID (or Channel ID + Guild ID, which is extremely rare and often not needed) is determined.
If Channel ID is detected, it will be auto-filled in the corresponding field. If the system offers a choice between Channel ID and Channel ID + Guild ID (as shown in the image below), choose the mode you need. In most cases, you should select Channel ID only.
Step 7. If Channel ID Was Not Detected
If Channel ID was not auto-detected, copy it manually from the browser address bar while you are in chat with Midjourney Bot and paste it into the corresponding field. In the first image above, Channel ID is marked with 1.
Step 8. Activation
After adding your account, activation usually completes in about 20-40 seconds.
As soon as your account gets the active status, copy your API Key from the table row with your added Discord account.
If you used incognito mode, just close that window after setup to keep your token valid.
Quick API Test (Optional)
After your account is active, test image generation with /imagine:
curl -X POST https://api.userapi.ai/midjourney/v2/imagine \
-H "Content-Type: application/json" \
-H "api-key: YOUR_API_KEY" \
-d '{ "prompt": "a dog lying on a cozy couch" }'
Typical response:
{
  "hash": "6794f6ef-866a-4bc3-b0bc-7b28ec010d1b"
}
Use this hash in the /status endpoint to get generation progress and final result.